Assignments
- Make a website and describe how you did it
- Intruduce yourself in about page
- Link to the tutorial that you have follow in order to learn GIT
- Explain the GIT workflow
- INCLUDE SCREENSHOTS OF THE PROCESS
- Sign and upload the student agreement
Week 1
git config --global user.name “Mona Peyvasteh"
git config --global user.email motahareh.peyvasteh@oulu.fi
Those commands will add my Git username and configure my email address for uploading.
To generate the SSH key I used this command:ssh-keygen -t rsa -C motahareh.peyvasteh@oulu.fi
After that, I opened the file id_rsa in newly created ssh folder and copied the whole public key. Then, I browsed my gitlab account, went to User Settings > SSH Keys (Figure 1) and pasted the key into the Key textbox.

Figure 1. Pasting the SSH key.
To create a local copy of the remote repository, I used a clone command by going to my gitlab account, copying the Clone With SSH address and typing this command (Figure 2):
git clone … (my Fab Lab Oulu repository address)
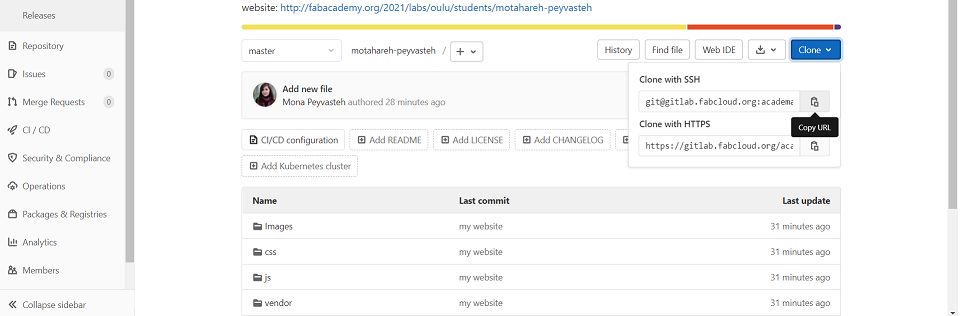
Figure 2. Copying the Clone With SSH address.
Since I was not going to use Fab Academy templates that was prepared by repository, I cloned the repository to a local directory on my laptop and deleted them which for that step, Ivan helped me a lot. To remove all the files, I used git rm -r command.
But here, a couple of errors and warning appeared in Git Bash. First:
Warning: Permanently added 'gitlab.fabcloud.org,13.59.248.79' (ECDSA) to the list of known hosts. git@gitlab.fabcloud.org: Permission denied (publickey). fatal: Could not read from remote repository. Please make sure you have the correct access rights and the repository exists.
With the guidance of Ivan,I typed ssh -vvT git@gitlab.fabcloud.org to determine where git tries to search for your private key. Due to my computer setup, the keys were generated in a different place to the one that git was expecting. Moving the keys to the right position solved the issues.
Important! Since I was using Gitbash which is considered as a shell, everytime I opened Gitbash, I needed to get access to the folder where the repository was located. So because it was not automatically located in my folder repo, I had to use the command cd “the path of local repository” to be inside the git repo and if I forgot to do that, I would faced this error: fatal: not a git repository (or any of the parent directories): .gitgit add -A will add all modified files to the stage area, so can be later added to the commit.
Then, I used git status command which shows the status of changes as untracked, modified, or staged.
After adding, 'commit' command will store the files that are in the index area, into the local repository. So, I named my update to know what I changed and typed: git commit -m "change I did"To download the last copy from the repository and synchronize local repository with the remote repository, I used:
git pull
Finally, to upload the files to the repository, I used 'push' command. You should check the image size restriction of the files before pushing.
To add the configuration file (.gitlab-ci.yml) to the root directory (master), you should simply follow the steps in Figure 3. The .gitlab-ci.yml file is a YAML file where you configure specific instructions for GitLab CI/CD. In this file, you define:
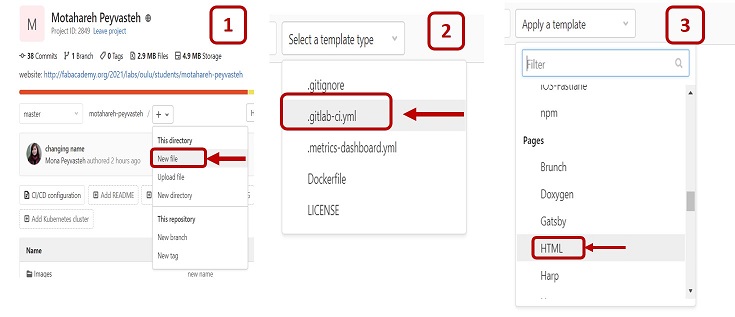
Figure 3. Adding the configuration file.
During next weeks after this week, I faced an error when uploading new files to the remote repository which much took time to solve it with the great help of our local instructor, Ivan, and his inclusive tutorial he provided in the local wiki page of Fablab Oulu. So, to document the steps for myself and also for future students, I will explain the steps we took to solve the issue, here.
IMPORTANT:The maximum size of each push should be smaller than 10MB. If you try to push one or more commits which their sizes are bigger, then you are receiving this error: remote:fatal: pack exceeds maximum allowed size. The problem is that the commit containing the file will be pushed anyhow, causing the problem. The most important recommendation is to check the size of your files BEFORE committing.
Once you have added the files to your stage area and BEFORE you commit them, you can check the size of all the files that are ready to be committed:
git diff --staged --name-only | xargs du -sh
If you want to see all the files in your stage area ordered by size (KB) (remember this command must be executed after the add but before the commit):
git diff --staged --name-only | xargs du -s | sort -rn
But in case your directory and file names have spaces, try the following command:
git diff --staged --name-only | xargs -d '\n' du -sh
git diff --staged --name-only | xargs -d '\n' du -s | sort -rn
In this case you need to remove the file from the stage area:
git restore --staged <offending file>
Other option as Neil also recommended, is that you run the command:
du -sh * | sort -rn
But if you push a big size file, there are a few ways to solve thr issue as Ivan recommended:
rebasepush the commits.Due to GIT architecture, it is not straight forward to find the size of a GIT commit. But This stack-overflow thread. By the following command, you can see a number (that you define) of the last commits you have pushed:
git log --oneline --decorate -10
For example, for my case, the last successful commit that has been pushed was 9446f2 (Figure 6). You can see that the (origin/master is pointing there).
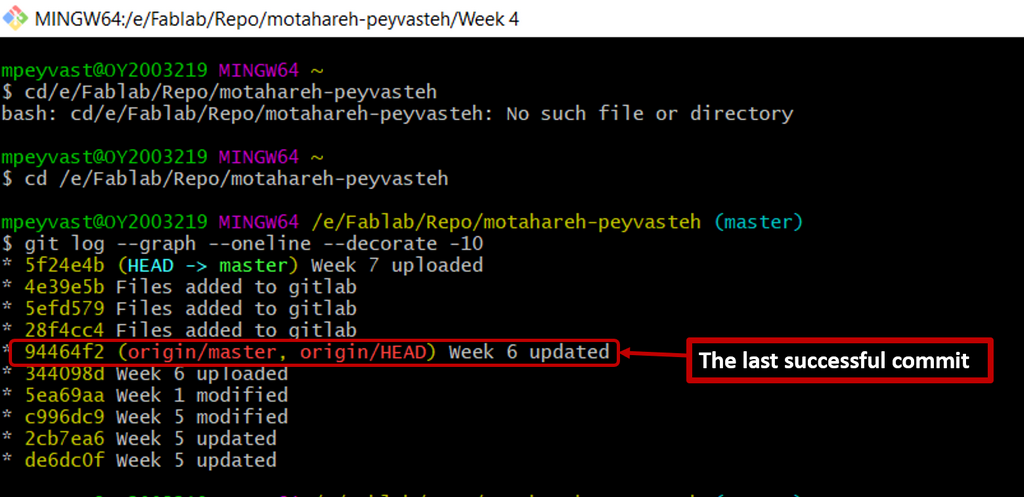
Figure 6. Finding the commit with the offending file in Gitbash
Now we can push each subsequent commit one after another to find the commit with the offending file:
git push origin <Commit_hash>:master>
where <Commit_hash> is the commit id that you want to push. The first commit that fails is the one that is having the offending file/s. Now, we know which is the commit that we have to change.
Homepage includes a shortcut to all of the contents provided in websites with a clear and user-friendly navigation. In About me section, you should provide a short introduction of yourself in addition to your signed Student Agreement. Since documentation of the tasks for each week is very comprehensive, it could be a good idea to add a sidebar and categorize the sections in order to facilitate reading the content for the readers.
I did not have any experience with html, css or javascrip and also, I was going to use a free bootstrap template rather than using the Fab Academy template, therefore I used this useful tutorial to learn the basic elements.Then, I chose Freelancer template from Start Bootstrap to modify it according to my own style.
I recommend NOT to change your template because it would take time to transfer all the content to the new style.
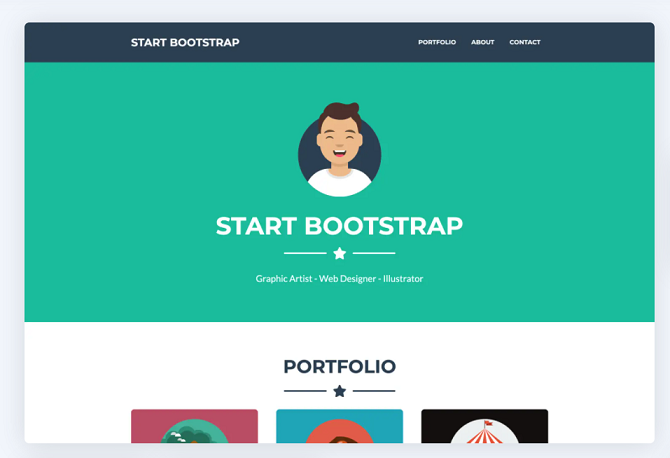
Figure 7. Chosen template from Start Bootstrap page.
After downloading the template, I started with Notepad++ and wrote a simple page according to the instruction we received from the lectures of the local instructors (Figure 4).
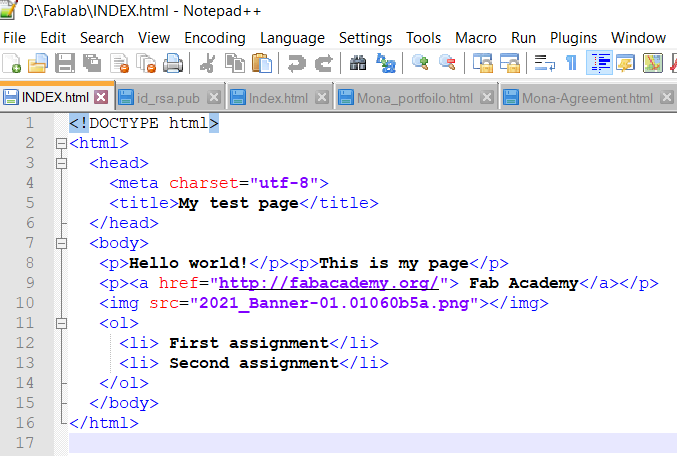
Figure 8. Testing with Notepad++ .
Then, I started editing the index.html file from the template folder and started to modify it based on my own content. As I mentioned before, I was not familiar with HTML or CSS, but with modifying the commands and text and checking the real-time changes by refreshing the page, I almost figured out how and where I should apply my desired changes. For example, I added drop-down lists for weekly assignments and final project (Figure 6). I also switched to Visual Studio Code to develop my website.
Figure 9. Creating drop-down lists in HTML in Viusal Code Studio.
For the final project, I decided to find some ideas related to my research to help my measurements. Then, after discussing with my supervisor, I came up with two ideas. I am working a spectroscopic setup using fiber optics to probe meat samples. But in that setup, there is no focusing and there are no lenses on fibers to focus light on the sample and/or to collect light from the sample. For conducting long-time measurements, focusing is more important since it could provide better signals.
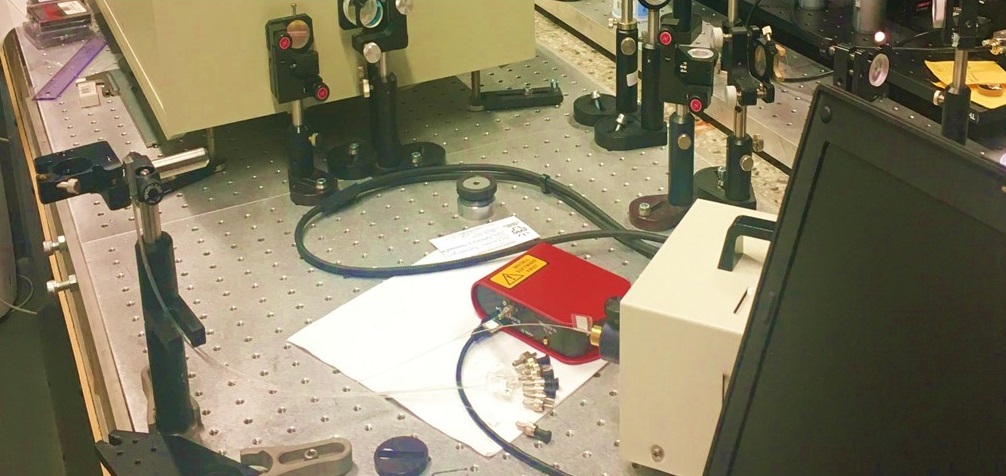
Figure 10. My fiber-optic setup in OPEM unit, University of Oulu, Finland.
I will choose the second idea at this stage since it can cover all of the fab academy contents which is required for the final project.
During the second week, I came up with the idea of a hexapod platform holding the optical fibers and controlling their movement direction over the sample (Figure 2).
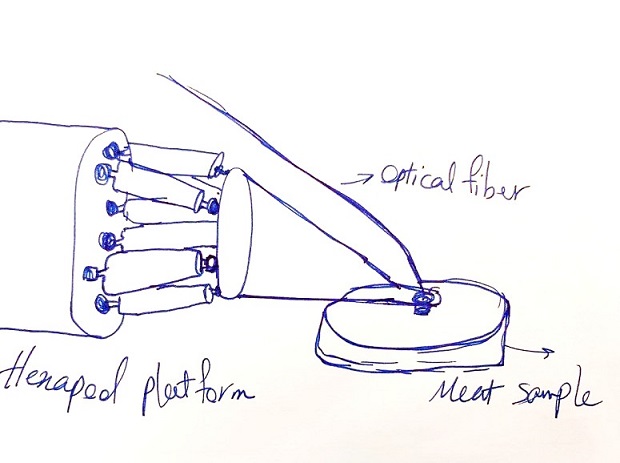
Figure 11. Simple sketch of the hexapod platform attached to an otpical fiber.
During this week, I got familiarized with many new topics including how to make a website with bootstrap, HTML and javascript and also, GitLab Version Control that I did not know about them at all. First, it was overwhelming but after a while with more study and with the help of our local instructor, I leaned how to host my website in gilab. Do not forget that always keep an eye for the size of files you upload on gitlab. If you surpass the limit, you would not be able to push your files.
